HOW TO MAKE A PHOTO COLLAGE USING GIMP #4

How To Make A Photo Collage In Gimp #4

<<<<<Instructions>>>>


Open up Gimp and go to >>>FILE>>>NEW>>>TEMPLATE and pick the>>>A4 SIZE;

209.97 Width,

297.01 Height

in mm. 

2480 Width

3508 Height

in px

Go to>>>IMAGE>>>GUIDES>>>NEW GUIDE BY PERECENT and pick>>>DIRECTION>>>HORIZONTAL>>>POSTION (In Percent)>>>50.00

And again Go to>>>IMAGE>>>GUIDES>>>NEW GUIDE BY PERECENT and pick>>>DIRECTION>>>VERTICAL>>>POSTION (In Percent)>>>50.00

Repeat this for how many photos you want and spread out the guides evenly over the page. I used eight boxes in total and I >>>HOVERED THE CURSOR over the guide and>>>HELD SHIFT  to drag around the guide into sections.
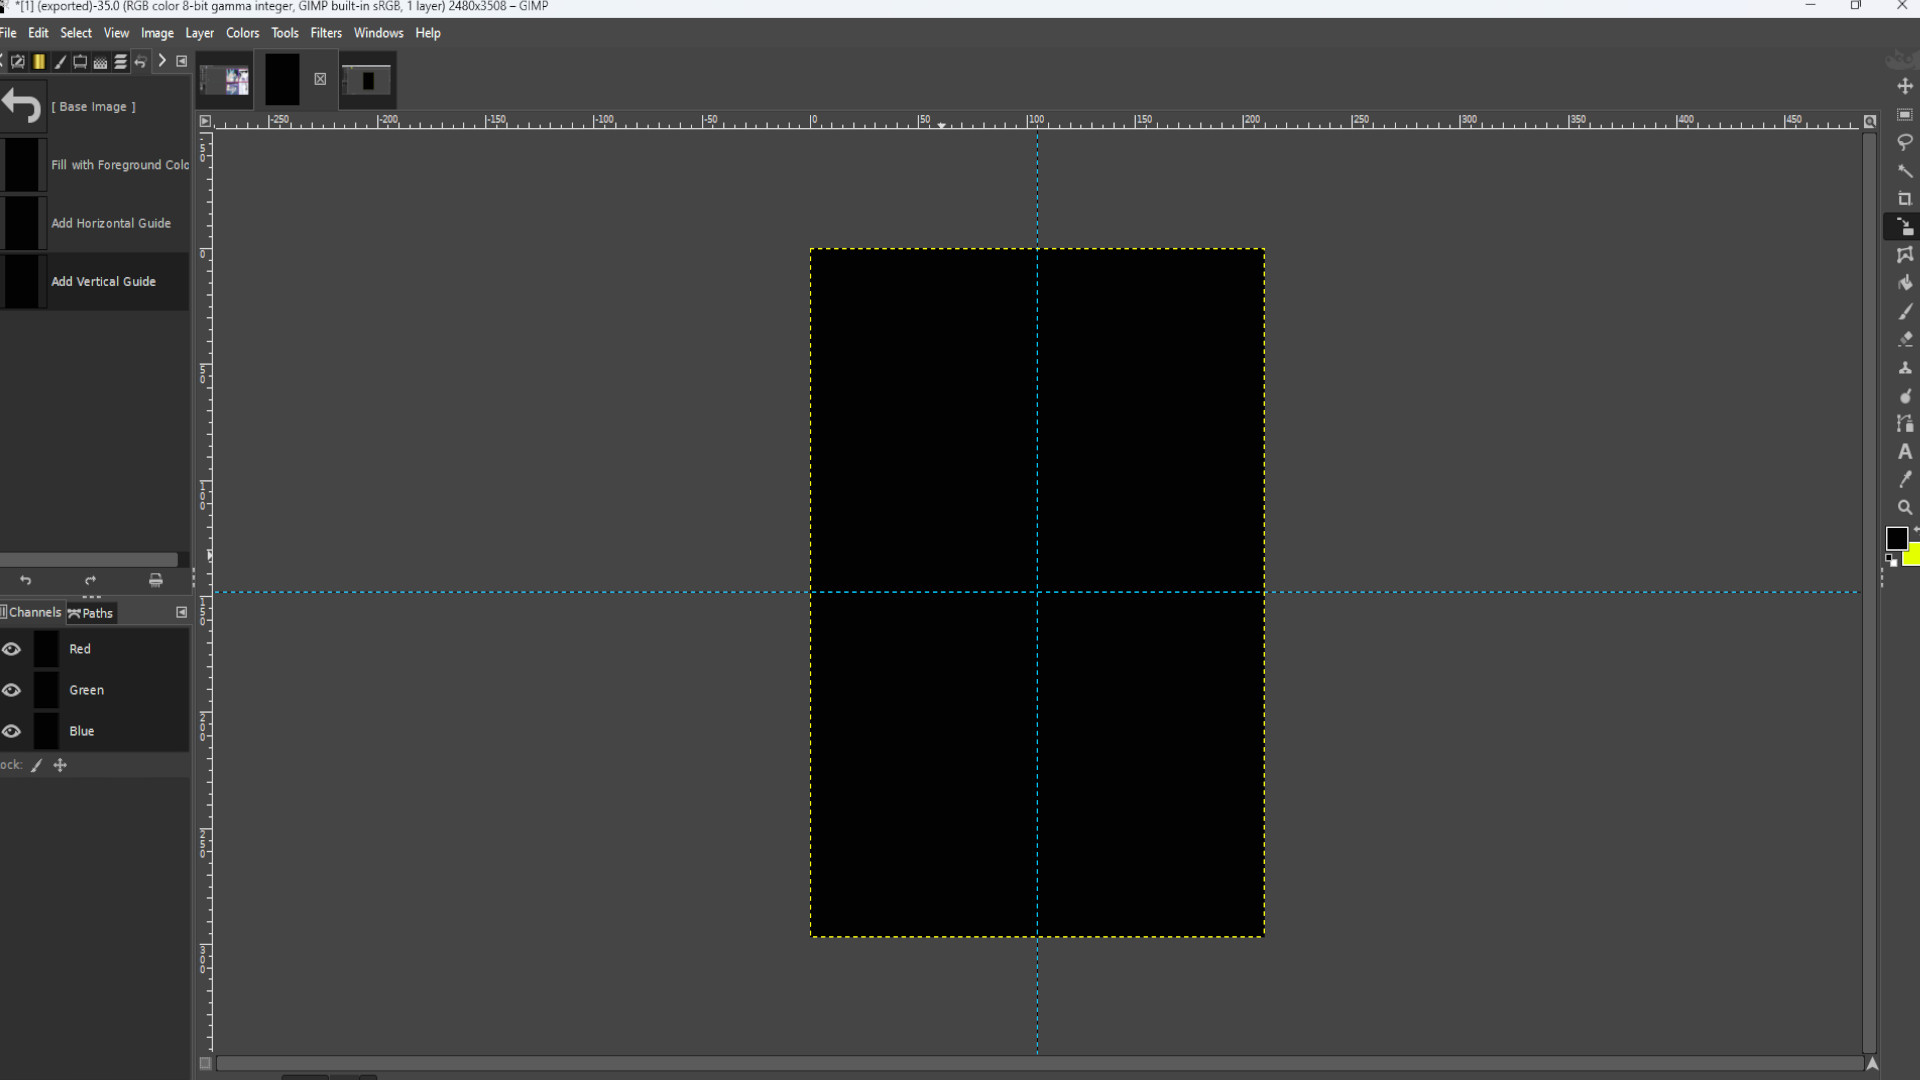
Open up>>>SHAPE in this case a cannabis leaf  or>>>DRAG AND DROP file into Gimp. If you see on the>>>LEFT HAND SIDE LAYERS PANEL>>>FLOATING SELECTION>>>RIGHT CLICK on the>>>FIRST LAYER and>>>SELECT>>>TO NEW LAYER.


Go to>>>LAYER>>>TRANSPARENCY>>>ADD ALPHA CHANNEL. If it’s greyed out it’s been added and you can ignore this step. 

>>RESIZE the image to fit the guides outlines by using the>>>RESIZE TOOL or using shortcut>>>HOLD DOWN>>>SHIFT and>>>PRESS>>>S to get the scale options to come up. It should snap into place but don’t be scared to make it bigger as long as it fits in the guides.


>SELECTING the>>>SHAPES LAYER the>>>FIRST LAYER in the>>>LAYERS PANEL on the>>>LEFT HAND SIDE and with>>>IT SELECTED use the>>>FUZZY TOOL to>>>HIGHLIGHT IT you may want to>>>HOLD SHIFT>>>HOLD the>>>LEFT BUTTON DOWN on your>>>MOUSE or TOUCHPAD and>>>DRAG DOWNWARDS to>>>HIGHLIGHT it.


Go to>>>LAYER>>>HOVER>>>over>>>TRANSPARNCY>>>and click on>>>ADD ALPHA CHANNEL. Then with the>>>BOTTOM >>>LAYER>>>HIGHLIGHTED and the>>>SHAPE>>>HIGHLIGHTED>>>RIGHT CLICK on any bit of the canvas>>> and go to>>>EDIT>>>CUT or use the shortcut by>>>HOLDING DOWN>>>CTRL>>>and>>>X  to cut the shape into the background.


>>>REPEAT>>>STEP>>>6 and>>>7 until you added the>>>BACKGROUND SHAPE to all the boxes. 


With the>>>SHAPE LAYER in the>>>LEFT HAND SIDE the>>>FIRST LAYER in the>>>LAYERS PANEL>>>TURN OFF the>>>LAYER by>>>CLICKING on the>>>FIRST EYE. 


Now with the>>>BOTTOM LAYER SELECTED>>>OPEN a>>>FILE or>>>DRAG AND DROP FILE into Gimp and if not already>>>PLACE at the>>>BOTTOM of the>>>LAYERS in the>>>LAYERS PANEL so the image is behind the shapes.


With the>>>BOTTOM LAYER SELECTED use the>>>RESIZE TOOL to>>>RESIZE the>>>IMAGE>>>CENTRING the>>>IMAGE to the>>>SHAPE you can use shortcut by>>>HOLDING>>>CTRL>>>and>>>PRESSING>>>R to get the resize options to come up.


With the>>>SECOND LAYER SELECTED of the>>>CUT>>>OUT >>>SHAPES with>>>BACKGROUND and using the>>>FUZZY TOOL>>>CLICK on the>>>SHAPE with the>>>IMAGE in to>>>HIGHLIGHT it.    

Go to>>>SELECT>>>INVERT to invert the highlighted bit.


You may want to>>>SELECT THE BOTTOM LAYER and use the>>>LASSO and>>>RECTANGLE SELECT and the>>EDIT>>>CUT options to get rid of any unwanted bits that overlay in the next section below, above or left and right of the boxes. You may also need to>>>ADD ALPHA CHANNEL more than once for each bit if it doesn’t appear to be>>>TRANSPARENT. Also you may lose the>>>SHAPE so>>>UNHIDE the>>>TOP LAYER by>>>CLICKING on the>>>EYE in the>>>LEFT>>>HAND>>>SIDE>>>LAYERS>>>PANEL.>>>SELECT the>>>TOP LAYER>>>HIGHLIGHT it by using the>>>FUZZY TOOL>>>SELECT the>>>BACKGROUND PICTURE WITH SHAPES on in this case the>>>SECOND LAYER>>>FIT the>>>HOLE with the>>>PICTURE and use>>>EDIT>>>CUT to remove the background keeping the shape.  


>>>REPEAT>>>STEPS 10-15 until you have all the images behind the frames making sure the>>>BACKGROUND is the>>>TOP LAYER>>>CUTTING any unwanted bits.

With the>>>BACKGROUND LAYER>>>SELECTED with the>>>SHAPES, in the>>>LEFT HAND SIDE>>>LAYERS PANEL the>>>SECOND LAYER in this case use the>>>FUZZY TOOL to>>>HIGHLIGHT the>>>SHAPE.

>>>TURN OFF the>>>LAYERS by>>>TURNING OFF the>>>EYE of the image layers in the>>>LEFT HAND SIDE>>>LAYERS PANEL one by one to determine what image to cut. 

With the in this case>>>BOTTOM LAYER SELECTED and going to>>>SELECT>>>INVERT to invert and using the>>>RIGHT CLICK on any bit of>>>CANVAS and going to>>>EDIT>>>CUT to cut any of the unwanted bits or use the shortcut by>>>HOLDING DOWN>>>CTRL and>>>PRESSING>>>X so you get the shape for the image.

>>REPEAT>>>STEPS>>>16-19 until you cut out shapes for each image you laid down.

>>SELECT in this case the>>>SECOND LAYER the>>>BACKGROUND LAYER with>>>SHAPES on>>>RIGHT CLICK>>>ANYWHERE on the>>>CANVAS and>>>PRESS>>>DELETE LAYER to DELETE the>>>BACKGROUND leaving only the now shaped images.

Go to>>>LAYER>>>ADD NEW LAYER and put it at the>>>BOTTOM of the LAYERS PILE on the>>>LEFT HAND SIDE LAYERS PANEL.

With the>>>BOTTOM LAYER>>>SELECTED >>>CHOSING a>>>COLOUR and using the>>>BUCKET FILL TOOL colour in the>>>BACKGROUND.

>>>ADD another file for the background by>>>OPENING AS NEW LAYER or>>>DRAGING AND DROPING into Gimp. If you see>>>FLOATING SELECTION in the>>>LAYERS TAB>>>RIGHT>>>CLICK on the>>>LAYER and >>>PRESS>>NEW LAYER.

>>>SELECTING the in this case>>>SECOND from the>>>BOTTOM in the>>>LAYERS TAB Use the>>>SCALE TOOL to>>>RESIZE the image or use shortcut >>>HOLD>>>SHIFT> and>>>PRESS>>>S to get the scale options up. 

Experiment with>>>FILL BUCKET, TEXTURES, COLOURS and>>>FILTERS to taste.

Experiment with>>>FILL BUCKET, TEXTURES, COLOURS and>>>FILTERS to taste.

>>>SELECTING the>>>TOP LAYER use the>>>LASSO to draw around the now>>>LEAF PHOTO.

>>ADD NEW LAYER and place at the>>>TOP of the LAYERS.>>>SELECTING the>>>FIRST LEAF PHOTO use the>>>FUZZY SELECT TOOL  to select the leaf photo and choosing a>>>COLOUR and SELECTING the>>>BUCKET FILL TOOL>>>FILL IN the>>>HIGHLIGHTED>>>SHAPE>>>EXPERIMENT  with>>>COLOURS to change the>>>BACKGROUND>>>COLOUR and>>>SHAPE UP the shape if need be.

With the in this case>>>YELLOW>>>LAYER selected in the>>>LEFT HAND SIDE>>>LAYERS>>>PANEL the>>>THIRD LAYER from the BOTTOM in this case>>>RIGHT CLICK on the>>>LAYER and>>>DUPLICATE LAYER using the>>>MOVE TOOL to>>>MOVE to the next section.


>REPEAT>>>STEP>>>29 until you have filled in all the outlines of the canvas and make sure in LAYERS they are near the bottom below>>ALL SHAPED IMAGES in this case a cannabis leaf.


Export image by going to>>>FILE>>>EXPORT TO or>>>EXPORT AS and save with a  JPG or PNG extension EG; COLLAGE__INSERT NUMBER.jpg or COLLAGE__INSERT NUMBER.png.

<<<<<FINAL PRODUCT>>>>


<<<<<VIDEO TUTORIAL>>>>


MIND YOUR HEAD ANIMATION TUTORIAL

Mind Your Head Animation Tutorial

<<<<<Instructions>>>>


Open up Gimp and go to >>>FILE>>>NEW>>>TEMPLATE and pick the>>>A4 SIZE;

209.97 Width,

297.01 Height

in mm. 

2480 Width

3508 Height

in px

>>LOAD FILE or >>>DRAG AND DROP file into Gimp. You can use the resize tool or use shortcut>>>HOLD SHIFT and PRESS R to resize the picture. You might see on the left hand side in the layers panel it says>>>FLOATING SELECTION. >>>RIGHT CLICK on the>>>LAYER and select>>>NEW LAYER now you can resize the picture.

Use the>>>FUZZY SELECT TOOL to select in this case the jagged bit. You can >>>HOLD>>>SHIFT and>>>CLICK on the>>>LEFT BUTTON of the>>>MOUSE to select more than one bit. If you have a bottom layer remove it by>>>CLICKING on the last>>>LAYER and>>>PRESSING DELETE LAYER

With the first layer selected>>>RIGHT CLICK on the picture and hover your cursor over>>>EDIT and>>>PRESS>>>COPY or use shortcut>>>HOLD>>>CTRL and>>>PRESS C to copy the selected bit.

With the first layer selected>>>RIGHT CLICK on the picture and hover your cursor over>>>EDIT and>>>PRESS>>>CUT or use shortcut>>>HOLD>>>CTRL and>>>PRESS X to cut the selected bits. The jagged bit should now be transparent as I did one bit at a time.


With the first layer selected>>>RIGHT CLICK on the picture and hover your cursor over>>>EDIT and>>>PRESS>>>PASTE  or use shortcut>>>HOLD>>>CTRL and>>>PRESS V to paste the selected bits. If you see>>>FLOATING SELECTION in the>>>LEFT HAND SIDE in the LAYERS PANEL>>>RIGHT CLICK on the>>>FIRST LAYER and>>>SELECT>>>TO NEW LAYER>>>EXPORT AS the first frame with a JPG or PNG extension for example 0.jpg or 0.png.


With the first layer selected PRESS the FIRST>>>EYE to hide the layer it should be transparent. If it’s not >>>DELETE the last >>>LAYER in the left hand side>>>LAYERS PANEL and go to >>>LAYER>>>TRANSPARENCY>>>ADD ALPHA CHANNEL.


With the>>>BOTTOM LAYER SELECTED use the>>>COLOUR PICKER to select in this case ANY>>>YELLOW BIT.


With the bottom layer selected Use the>>>PAINT BRUSH to fill in the transparent bit leaving in this case the jagged transparent bit completely yellow. If you can’t see the layers tab go to>>>WINDOWS>>>DOCKABLE DIALOGS>>>LAYERS to make it appear.


Go to>>>IMAGE>>>HOVER over>>>GUIDES and>>>SELECT>>>NEW GUIDE (BY PERCENTAGE) leave the options as they are >>>DIRECTION>>>HORIZONTAL>>>POSITION>>>50.00 and press ok. Now drag the line in the middle of the picture by>>>HOLDING SHIFT and>>>HOLDING the>>>LEFT MOUSE BUTTON or>>>LEFT OF THE TOUCHPAD and dragging into position in this case the>>>BOTTOM of the>>>STICKMAN. Now repeat the step moving the guides now at the>>>TOP of the stickman>>>EXPORT AS changing the file name.


Repeat>>>STEP 3-6  to>>>SELECT>>>COPY>CUT and>>>PASTE the stickman 


With the >>>FIRST or >>>SECOND >>>LAYER>>>SELECTED in the left hand side layers panel>>>HIDE the LAYER by clicking on the on the first or second >>>LAYERS >>>EYE  to hide the layer.


With the>>>BOTTOM LAYER>>>SELECTED fill in the transparent background by using the>>>COLOUR PICKER TOOL and>>>SELECTING the>>>COLOUR in this case >>>SELECTING ANY OF THE YELLOW and using the>>>BRUSH to fill in the hole.


>>>SELECTING the>>>BOTTOM LAYER>>>UNHIDE the>>>LAYER by>>>SELECTING THE LAYERS EYE to make it>>>VISBLE.


I want to make it look like the stickman has banged his head on the hovering object to do this use the>>>MOVE TOOL to move it up slightly and closer to the hovering object>>>EXPORT AS with a different file name when done. You may want to move the stickman closer to the object and>>>EXPORT AS with different file name before doing any of the this step.


Repeat >>>STEP 15 >>>EXPORTING AS  each time you move it up slightly and don’t forget to rename the file I did numbers so this one will be >>>3.jpg or >>>3.png and so forth. Do this until you finished animating the sign in this case until it’s in the original position.

>>>TURN ON the>>>JAGGED EDGE LAYER by>>>CLICKING on the>>>LAYERS EYE SECTION>>>The>>>FIRST or>>>SECOND LAYER in the>>>LAYERS TAB on the>>>LEFT HAND SIDE and>>>EXPORT AS with different file name.

Experiment with>>>COLOURS>>>BUCKET FILL>>>TEXTURES and>>>FILTERS to taste>>>EXPORT AS each time you changed it.


You can use a gif maker like EGIF.com to put the gif together and save as a>>>gif or>>>MP4 file.


<<<<<FINAL PRODUCT>>>>


<<<<<VIDEO TUTORIAL>>>>


RESPIRATOR ANIMATION TUTORIAL

Respirator Animation Tutorial

<<<<<Instructions>>>>


Open up Gimp and go to >>>FILE>>>NEW>>>TEMPLATE and pick the>>>A4 SIZE;

209.97 Width,

297.01 Height

in mm. 

2480 Width

3508 Height

in px

>>LOAD FILE or >>>DRAG AND DROP file into Gimp. You can use the resize tool or use shortcut>>>HOLD SHIFT and PRESS R to resize the picture. You might see on the left hand side in the layers panel it says>>>FLOATING SELECTION. >>>RIGHT CLICK on the>>>LAYER and select>>>NEW LAYER now you can resize the picture.

Use the>>>FUZZY SELECT TOOL to select in this case the stickman. You can >>>HOLD>>>SHIFT and>>>CLICK on the>>>LEFT BUTTON of the>>>MOUSE to select more than one bit.

With the first layer selected>>>RIGHT CLICK on the picture and hover your cursor over>>>EDIT and>>>PRESS>>>COPY or use shortcut>>>HOLD>>>CTRL and>>>PRESS C to copy the selected bit.

With the first layer selected>>>RIGHT CLICK on the picture and hover your cursor over>>>EDIT and>>>PRESS>>>CUT or use shortcut>>>HOLD>>>CTRL and>>>PRESS X to cut the selected bits.


With the first layer selected>>>RIGHT CLICK on the picture and hover your cursor over>>>EDIT and>>>PRESS>>>PASTE TO NEW LAYER or use shortcut>>>HOLD>>>CTRL and>>>PRESS V to paste the selected bits.


With the first layer selected PRESS the FIRST>>>EYE to hide the layer it should be transparent. If it’s not >>>DELETE the last >>>LAYER in the left hand side>>>LAYERS PANEL and go to >>>LAYER>>>TRANSPARENCY>>>ADD ALPHA CHANNEL.


With the>>>BOTTOM LAYER SELECTED use the>>>COLOUR PICKER to select in this case ANY>>>BLUE BIT.


With the bottom layer selected Use the>>>PAINT BRUSH to fill in the transparent bit leaving in this case the circle completely blue.   

>>>UNHIDE the LAYER by clicking on the on the first layer eye section to unhide the layer.   

>>>EXPORT AS for the first frame with a>>>JPG or>>>PNG extension for example >>>0.jpg or  >>>0.png.    

Use the>>>SCALE TOOL to scale it up or down slightly. In this case I’m going to make it look like the picture shrink scaling it down each time and>>>EXPORT AS the frame with a >>>JPG or>>>PNG extension at the end of the file name for example>>>1.jpg or>>>1.png. For shortcuts you can HOLD>>>SHIFT and>>>PRESS>>>S to scale the picture down.


Repeat step 12 >>>EXPORTING AS  each time you scaling it down slightly and don’t forget to rename the file I did numbers so this one will be >>>1.jpg or >>>1.png and so forth. Do this until you finished animating the sign. You may want to use the>>>MOVE TOOL to move it back into the centre of the blue circle. 

Experiment with filters, colours and the bucket tool but I rotated the picture once again rotating the picture ever so slightly by using the>>>ROTATE TOOL or use shortcut>>>HOLD SHIFT and PRESS R to rotate the picture and>>>EXPORT AS changing the file name. 

Repeat>>>>STEP 15 until you have down a full circle using>>>EXPORTING AS each time you>>>ROTATE the layer.

Go to>>>EDIT and click on>>>UNDO HISTORY to get the>>>UNDO HISTORY TAB up. And>>>UNDO until you first in this case rotated the layer>>>EXPORT AS changing the file name.


With the first layer selected. Use the>>>FUZZY SELECT TOOL to SELECT a eye but do experiment with other ideas you may have but if not select a eye. You can select the other by>>>HOLDING DOWN SHIFT and>>>CLICKING ON THE LEFT BUTTON OF MOUSE or>>>TOUCH PAD to select>>>BOTH EYES.


With the eyes selected use the>>>BUCKET FILL TOOL and choosing your colour>>>FILL IN the>>>EYES.


Repeat step 18 until you feel you have changed it enough times or you have ran out of colours or textures. Don’t forget to>>>EXPORT AS for each time you changed the colour and renaming each file.


>>>OPEN ANOTHER FILE or>>>DRAG AND DROP into Gimp. I want to animate the eyes even more and selected a round transparent background picture in this case a radiation sign. Before you do that with the eyes selected go to>>>EDIT>>>CUT or use the shortcut by>>>CTRL>>>X to cut the layer leaving the original colour for the eyes.


If it says>>>FLOATING SELECTION in the>>>LEFT HAND SIDE LAYERS PANEL>>>RIGHT CLICK on the layer and press>>>TO NEW LAYER


Use the>>>SCALE TOOL to >>>RESIZE image so in this case it fits the eye. You can use the shortcut by>>>HOLDING SHIFT and>>>PRESSING>>>S to resize the image.


With the top layer selected>>>RIGHT CLICK on>>>FIRST LAYER and>>>PRESS DUPLICATE LAYER and use the >>>MOVE TOOL on any of the >>>FIRST TWO LAYERS and >>>MOVE the layer  into the other eye.


With the top layer selected>>>RIGHT CLICK on>>>FIRST LAYER and>>>PRESS>>>MERGE DOWN and use the >>>OPACITY in the >>>TOP of the>>>LAYERS TAB on the>>>LEFT HAND SIDE >>>to make the layer>>>INVISBLE>>>EXPORT AS file and slowly use the>>>OPACITY to bring the picture back in. 


Repeat >>>STEP 25 until the layer is in its original state slowly bring in the>>>OPACITY back in and>>>EXPORT AS each time you changed the opacity in the>>>LAYERS SECTION.


Go to>>>EDIT>>>UNDO HISTORY and>>>UNDO just before you merged down the layers.


With the>>>FIRST or SECOND LAYER SELECTED use the>>>ROTATE TOOL to>>>ROTATE it slightly and>>>EXPORT AS with a different file name. You can use the shortcut by>>>HOLDING SHIFT and>>>PRESSING>>>R to rotate options to come up. If you can’t see the layers tab go to>>>WINDOWS>>>DOCKABLE DIALOGS>>>LAYERS to make it appear.


With the other>>>LAYER SELECTED use the>>>ROTATE TOOL to>>>ROTATE it slightly and>>>EXPORT AS with a different file name. You can use the shortcut by>>>HOLDING SHIFT and>>>PRESSING>>>R to rotate options to come up. You can also use the>>>MOVE TOOL to move it back into place. If you can’t see the layers tab go to>>>WINDOWS>>>DOCKABLE DIALOGS>>>LAYERS to make it appear.


Repeat>>>STEP>>>28 and>>>29 until you have done the full circle or animated enough>>>EXPORT AS each time you rotated both >>>TOP>>>LAYERS.


Experiment from here or you are done. I>>>SELECTED all the>>>LETTERS by using the>>>FUZZY TOOL and>>>HOLDING SHIFT and>>>DRAGING DOWNWARDS to>>>HIGHLIGHT the>>>OUTER FRAME the>>>WHITE BACKGROUND. Then I went to>>>EDIT>>>COPY>>>EDIT>>>CUT>>>EDIT>>>PASTE AS >>>NEW LAYER or shortcuts>>>HOLD CTRL and>>>PRESS C to copy the layer, >>>CTRL and>>>C to CUT the LAYER and>>>CTRL V to>>>PASTE back the layer leaving the images, background and text and a transparent background for the outer parts. 


Go to>>>LAYER>>>ADD NEW LAYER and drag the layer at the>>>BOTTOM in the>>>LEFT HAND SIDE LAYERS PANEL.


Now experiment again with the>>>OUTER TRANSPARENT BIT that is HIGHLIGHTED. Use the>>>BUCKET FILL, >>>TEXTURES, >>>FILTERS and>>>COLOURS to taste. Don’t forget to>>>EXPORT AS each time you>>>CHANGE the>>>BACKGROUND for moving backgrounds.


You can use a gif maker like EGIF.com to put the gif together and save as a>>>gif or>>>MP4 file.


<<<<<FINAL PRODUCT>>>>


<<<<<VIDEO TUTORIAL>>>>


SLIPPERY FLOOR ANIMATION TUTORIAL

Wet Floor Animation Tutorial

<<<<<Instructions>>>>


Open up Gimp and go to >>>FILE>>>NEW>>>TEMPLATE and pick the>>>A4 SIZE;

209.97 Width,

297.01 Height

in mm. 

2480 Width

3508 Height

in px

>>LOAD FILE or >>>DRAG AND DROP file into Gimp. You can use the resize tool or use shortcut>>>HOLD SHIFT and PRESS R to resize the picture. You might see on the left hand side in the layers panel it says>>>FLOATING SELECTION. >>>RIGHT CLICK on the>>>LAYER and select>>>NEW LAYER now you can resize the picture.


Use the>>>FUZZY SELECT TOOL to select in this case the stickman. You can >>>HOLD>>>SHIFT and>>>CLICK on the>>>LEFT BUTTON of the>>>MOUSE to select more than one bit.

With the first layer selected>>>RIGHT CLICK on the picture and hover your cursor over>>>EDIT and>>>PRESS>>>COPY or use shortcut>>>HOLD>>>CTRL and>>>PRESS C to copy the selected bit.

With the first layer selected>>>RIGHT CLICK on the picture and hover your cursor over>>>EDIT and>>>PRESS>>>CUT or use shortcut>>>HOLD>>>CTRL and>>>PRESS X to cut the selected bits.


With the first layer selected>>>RIGHT CLICK on the picture and hover your cursor over>>>EDIT and>>>PRESS>>>PASTE or use shortcut>>>HOLD>>>CTRL and>>>PRESS V to paste the selected bits.


If you see on the left hand side panel in the layers panel>>>FLOATING SELECTION>>>RIGHT CLICK on the layer and select>>>NEW LAYER 


With the first layer selected PRESS the FIRST>>>EYE to hide the layer it should be transparent. If it’s not >>>DELETE the last >>>LAYER in the left hand side>>>LAYERS PANEL and go to >>>LAYER>>>TRANSPARENCY>>>ADD ALPHA CHANNEL.


With the bottom layer selected and using the>>>COLOUR PICKER select in this case any yellow bit that’s not transparent.    

With the bottom layer selected Use the>>>PAINT BRUSH to fill in the transparent bit leaving in this case the triangle completely yellow.    

>>>UNHIDE the LAYER by clicking on the on the first layer eye section to unhide the layer.    

Use the>>>ROTATE TOOL to move it slightly. In this case I’m going to make it look like he’s falling so move it just slightly and>>>EXPORT the frame with a >>>JPG or>>>PNG extension at the end of the file name for example>>>0.jpg or>>>0.png. For shortcuts you can HOLD>>>SHIFT and >>>PRESS>>>R to rotate the stickman.    

Repeat step 12 >>>EXPORTING AS  each time you move it slightly and don’t forget to rename the file I did numbers so this one will be >>>1.jpg or >>>1.png and so forth. Do this until you finished animating the sign. 

Repeat step >>>3-7 to do the letters if you want to animate them or don’t to leave the bottom half still.


>>>TURN OFF THE LAYER by>>>CLICKING ON THE FIRST EYE in>>>THE LAYERS TAB on the>>>LEFT HAND SIDE. >>>and EXPORT the file. 

Repeat>>>>STEP 15 5-10 times>>>EXPORTING AS each time you turn on and off the layer.


You can use a gif maker like EGIF.com to put the gif together and save as a>>>gif or>>>MP4 file.


<<<<<FINAL PRODUCT>>>>


<<<<<VIDEO TUTORIAL>>>>


HOW TO MAKE A PHOTO COLLAGE USING GIMP #3

How To Make A Photo Collage In Gimp #3

<<<<<Instructions>>>>


Open up Gimp and go to >>>FILE>>>NEW>>>TEMPLATE and pick the>>>A4 SIZE;

209.97 Width,

297.01 Height

in mm. 

2480 Width

3508 Height

in px

Go to>>>IMAGE>>>GUIDES>>>NEW GUIDE BY PERECENT and pick>>>DIRECTION>>>HORIZONTAL>>>POSTION (In Percent)>>>50.00

And again Go to>>>IMAGE>>>GUIDES>>>NEW GUIDE BY PERECENT and pick>>>DIRECTION>>>VERTICAL>>>POSTION (In Percent)>>>50.00

Repeat this for how many photos you want and spread out the guides evenly over the page. I used eight boxes in total and I >>>HOVERED THE CURSOR over the guide and>>>HELD SHIFT  to drag around the guide into sections.
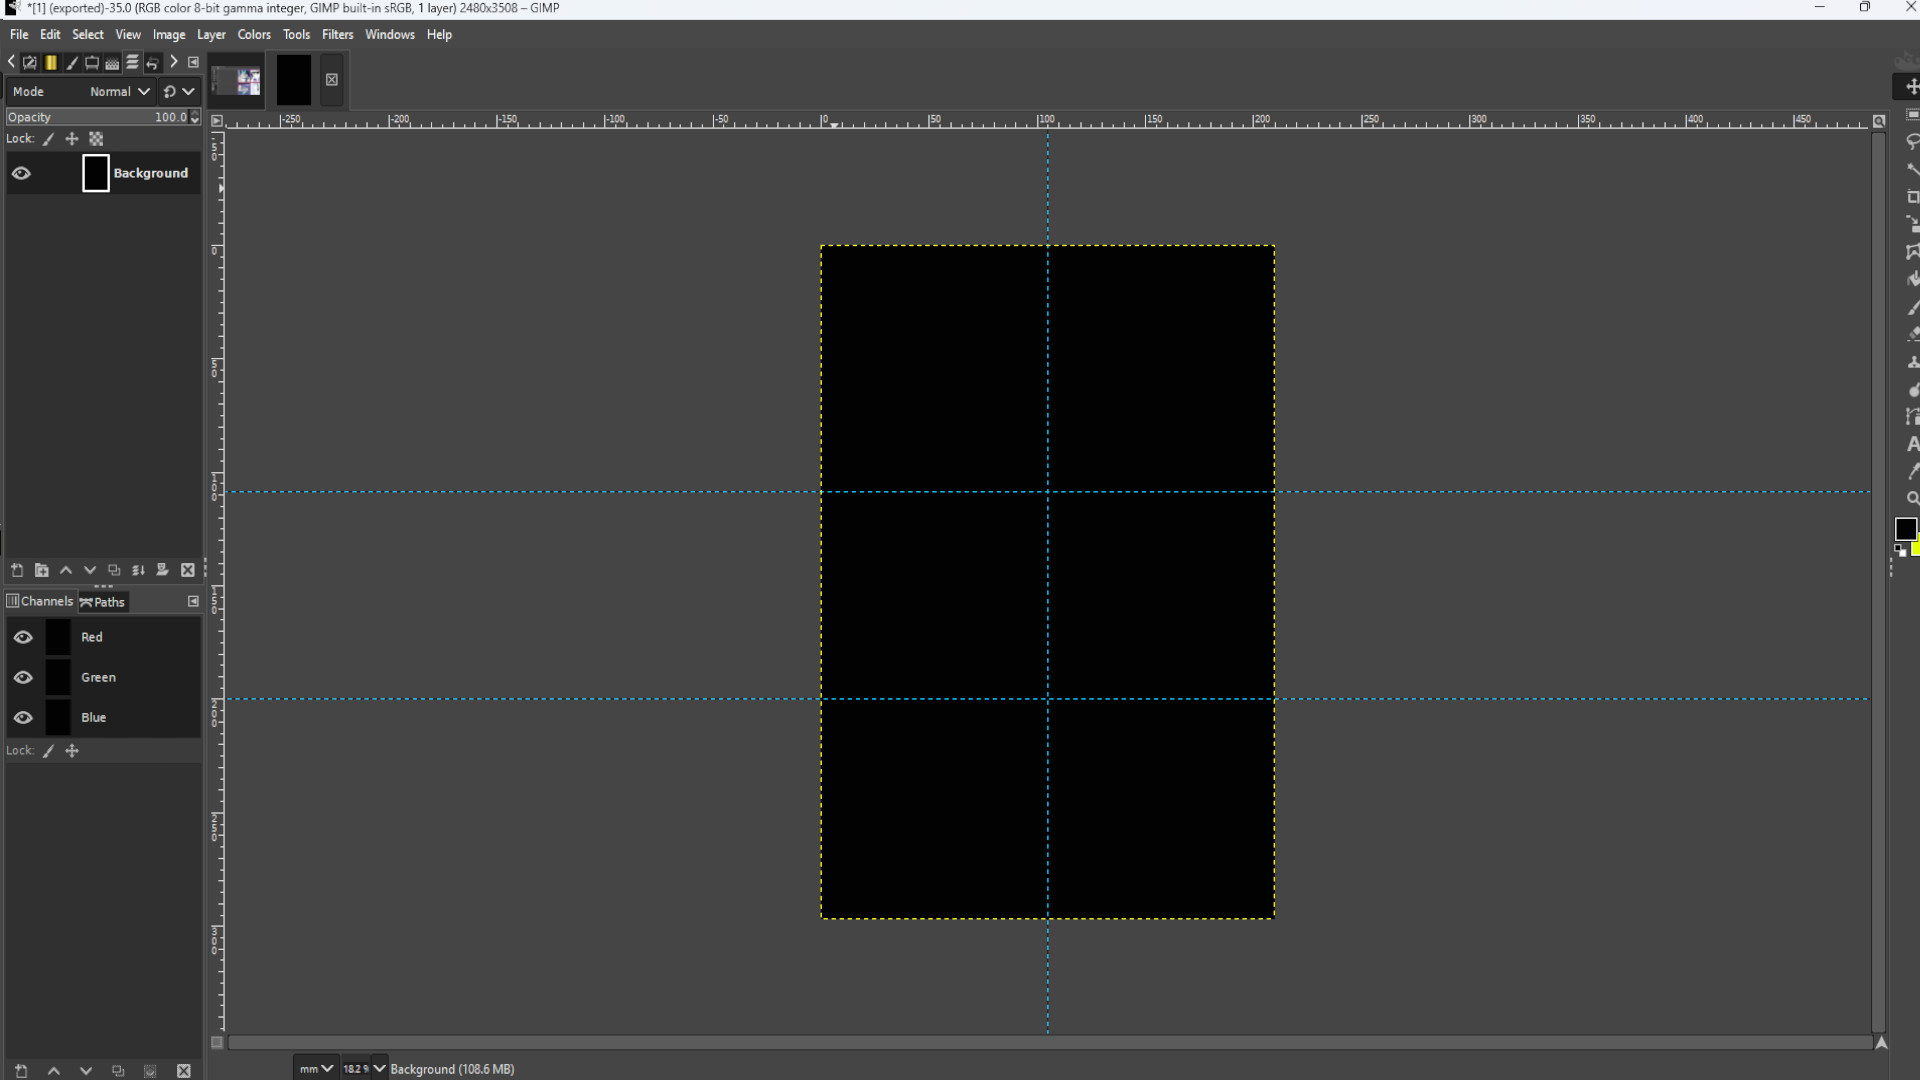
Using the>>>ELLIPSE SELECT TOOL DRAW a CIRCLE filling up the width of  the section but you can have it as big or small as you like.

Go to>>>LAYER>>>TRANSPARENCY>>>ADD ALPHA CHANNEL. If it’s greyed out it’s been added and you can ignore this step. 

Go to LAYER>>>ADD A LAYER


Use the>>>BUCKET FILL to fill in the circle leaving a couple of inches of the main background for the frame.


Once you’ve made your circle and with the circle highlighted>>>CLICK ON THE BOTTOM LAYER on the left hand side layer’s panel which is the background you started with. If you can’t see the layers tab then go to>>>WINDOWS>>>DOCKABLE DIALOGS>>>LAYERS


With the circle selected and you are on the bottom layer>>>HOLD>>>CTRL and>>>PRESS X to delete the background of the main background keeping the filled in coloured circle at the top of the layer.


Move the coloured circle around the sections and with it highlighted cut each sections main background (the one you started with.) Once done delete the circle.    

>>>SELECT THE BOTTOM LAYER AND>>>ADD PHOTO    

>>>USE THE RESIZE TOOL>>>SHIFT and>>>S to >>>SCALE up or down the image it’s best to work with bigger pictures.    

Repeat Steps 10 and 11  until it’s filled out.   

Add texture and stretch it the entire canvas space,  make sure you are on the top layer.

Go to the>>>LAYERS TAB and>>>TURN OFF THE TEXTURE LAYER  by clicking on the first eye it should be the top layer in the left hand side layers tab

Go to>>>LAYERS TAB and>>>SELECT THE CIRCLES by using the>>>FUZZY SELECT TOOL making sure the frame is untouched but the middle is highlighted, it should be second from the top in the layers section.

Unhide layer by clicking on the first layer eye in the left hand side of the layers section.

Now highlighted>>>HOLD CTRL and>>>PRESS X to remove the inner texture leaving a background around it.

EXPERIMENT with BUCKET FILL, COLOUR and FILTERS to taste.

Export image by going to>>>FILE>>>EXPORT TO or>>>EXPORT AS and save with a  JPG or PNG extension EG; COLLAGE__INSERT NUMBER.jpg or COLLAGE__INSERT NUMBER.png.


<<<<<FINAL PRODUCT>>>>


<<<<<VIDEO TUTORIAL>>>>


HOW TO MAKE A PHOTO COLLAGE USING GIMP #2

How To Make A Photo Collage In Gimp #2

<<<<<Instructions>>>>

Open up Gimp and go to >>>FILE>>>NEW>>>TEMPLATE and pick the>>>A4 SIZE;

209.97 Width,

297.01 Height

in mm. 

2480 Width

3508 Height

in px

Go to>>>IMAGE>>>GUIDES>>>NEW GUIDE BY PERECENT and pick>>>DIRECTION>>>HORIZONTAL>>>POSTION (In Percent)>>>50.00

And again Go to>>>IMAGE>>>GUIDES>>>NEW GUIDE BY PERECENT and pick>>>DIRECTION>>>VERTICAL>>>POSTION (In Percent)>>>50.00

Repeat this for how many photos you want and spread out the guides evenly over the page. I used eight boxes in total and I >>>HOVERED THE CURSOR over the guide and>>>HELD SHIFT  to drag around the guide into sections.

Using the>>>RECTANGLE SELECT draw a square box leaving a inch or two around the edges it should snap into place when you draw around the guides.

Go to>>>LAYER>>>TRANSPARENCY>>>ADD ALPHA CHANNEL. If it’s greyed out it’s been added and you can ignore this step. 

Go to LAYER>>>ADD A LAYER


Use the>>>BUCKET FILL to fill in the square leaving a couple of inches of the main background for the frame.


Once you’ve made your framed box and with the square highlighted>>>CLICK ON THE BOTTOM LAYER on the left hand side layer’s panel which is the background you started with. If you can’t see the layers tab then go to>>>WINDOWS>>>DOCKABLE DIALOGS>>>LAYERS


With the box selected and you are on the bottom layer>>>HOLD>>>CTRL and>>>PRESS X to delete the background of the main background keeping the filled in coloured square at the top of the layer.


Move the coloured square around the sections and with it highlighted cut each sections main background (the one you started with.) Once done delete the square.    

>>>SELECT THE BOTTOM LAYER AND>>>ADD PHOTO    

>>>USE THE RESIZE TOOL>>>SHIFT and>>>S to >>>SCALE up or down the image it’s best to work with bigger pictures.    

Repeat Steps 10 and 11  until it’s filled out.   

Add texture and stretch it the entire canvas space,  make sure you are on the top layer.

Go to>>>LAYERS TAB and>>>SELECT THE FRAME, the frame should be second from the top.

Go to the>>>LAYERS TAB and>>>TURN OFF THE TEXTURE LAYER  by clicking on the first eye it should be the top layer in the left hand side layers tab

With the>>>FUZZY SELECT TOOL, SELECT a bit of frame and it should highlight the whole frame.

Go back to>>>LAYOUT TAB on the LEFT HAND SIDE and TURN ON the TEXTURE LAYOUT using the EYE. There should now be a highlighted boarder around the texture of choice.

Now highlighted>>>HOLD CTRL and>>>PRESS X to remove the inner texture leaving a frame around it.

EXPERIMENT with BUCKET FILL, COLOUR and FILTERS to taste.

Export image by going to>>>FILE>>>EXPORT TO or>>>EXPORT AS and save with a  JPG or PNG extension EG; COLLAGE__INSERT NUMBER.jpg or COLLAGE__INSERT NUMBER.png.


<<<<<FINAL PRODUCT>>>>


<<<<<VIDEO TUTORIAL>>>>


HOW TO MAKE A PHOTO COLLAGE USING GIMP #1

How To Make A Photo Collage In Gimp #1

<<<<<Instructions>>>>


Open up Gimp and go to >>>FILE>>>NEW>>>TEMPLATE and pick the>>>A4 SIZE;

209.97 Width,

297.01 Height

in mm. 

2480 Width

3508 Height

in px

Go to>>>IMAGE>>>GUIDES>>>NEW GUIDE BY PERECENT and pick>>>DIRECTION>>>HORIZONTAL>>>POSTION (In Percent)>>>50.00

And again Go to>>>IMAGE>>>GUIDES>>>NEW GUIDE BY PERECENT and pick>>>DIRECTION>>>VERTICAL>>>POSTION (In Percent)>>>50.00

Repeat this for how many photos you want and spread out the guides evenly over the page. I used eight boxes in total and I >>>HOVERED THE CURSOR over the guide and>>>HELD SHIFT  to drag around the guide into sections.

Using the>>>LASSO draw shapes and stick to the guide lines it should snap into place when you draw around the guides.

Go to>>>LAYER>>>TRANSPARENCY>>>ADD ALPHA CHANNEL. If it’s greyed out it’s been added and you can ignore this step. 

Once you have drawn a shape and it’s highlighted HOLD>>>CTRL>>>and>>>PRESS X to delete the background. If you have more than one layer you may want to swap layers and delete each layer’s background.


>>>OPEN UP first photo or >>>DRAG AND DROP into Gimp. Go to>>>LAYERS on the left hand side panel and put the first photo at the bottom of the layer. If you can’t see layers then go to>>>WINDOWS>>>DOCKABLE DIALOGS>>>LAYERS to get it to appear.


Now with the first photo layer selected use the>>>MOVE TOOL and>>>DRAG INTO POSITION  till it’s centred and visible in the transparent section.


Repeat Step 3, 5, 6 and 7 till you have your it filled out. You will have overlay on each section so remember to>>>DRAW AROUND EACH OVERLAYED BIT with the>>>LASSO and>>>HOLD>>>CTRL and>>>PRESS X to delete any unwanted bits. You must be selecting the right photo or it won’t delete.   

Selecting the>>>TOP LAYER on the left hand side panel go to>>>LAYER>>>ADD LAYER   

With the>>>TOP LAYER SELECTED  and using the>>>LASSO draw around the photos outline sticking to the outer of the photo and making them as even as possible but isn’t important.   

Repeat Steps 9 and 10  until it’s filled out.   

Selecting the top layer and the frames around your photos go to the>>>LAYERS SECTION on the left hand side  and>>>RIGHT CLICK ON TOP LAYER and press>>>MERGE DOWN. Do this for each bit of the frame keeping the photos separate. If you are unsure what is the frame then>>>PRESS THE EYE on the>>>LEFT HAND SIDE of the>>>LAYER SECTION for each bit of layer.

Use the>>>FUZZY SELECT TOOL and press any bit of the frame to highlight all the frame and leaving the photos unhighlighted. With the frame selected use>>>COLOURS>>>FILTERS>>> 

Export image by going to>>>FILE>>>EXPORT TO or>>>EXPORT AS and save with a  JPG or PNG extension EG; COLLAGE__INSERT NUMBER.jpg or COLLAGE__INSERT NUMBER.png.


<<<<<FINAL PRODUCT>>>>


<<<<<VIDEO TUTORIAL>>>>


PHOTO BUCKET; HISTORIC POSTS

Photo Bucket – Historic Posts

Old Serpentine Factory

The most complete remaining building of the Serpentine factory is a traditional, stone rubble building, three storeys high, with a gabled front, an opening on each floor and a slate roof. It is at the seaward end of the range of buildings and is dated 1866.
‘In the works, small ornaments in serpentine stone were being made in 1838. The firm evidently prospered for, about the years 1854 – 1889, the factory was producing mantelpieces, shop fronts, ornamental urns, etc. on a large scale (Lizard Field Club, Poltesco Cadgwith Nature Trail).
The wheel pit (90586*0) for a 25-foot diameter water wheel is still visible at the landward end of this range of buildings. The wheel would have worked machinery for the sawing up of the serpentine; and near the stream is a large slab of stone, scored by saw marks.
‘The finished articles were shipped from Penrhyn and Falmouth. Slabs of serpentine cut here were used in the Duchy of Cornwall buildings in London, and the firm had showrooms near the Strand where a vase 7’6″ high was to be seen (Lizard Field Club, Poltesco Cadgwith Nature Trail) (National Trust 1986).
Gabled three-storey rectangular stone warehouse, built into rising ground so top floor opens at ground level on the rear. The front elevation has a large doorway to each floor and datestone LSCL 1866 in gable apex. The warehouse is the remnant of a once much larger factory complex whose ruins can be seen on the left. Adjacent on the right is Rouds C18 capstan house of irregular rubblestone and now roofless (possibly originally thatched). Blocked opening for hauling rope/cable on the seaward face. Interesting for demonstrating changing industrial activities, i.e. Pilchard fishing and pressing, here followed by quarrying, polishing and processing of serpentine stone. Both industries once enjoyed prosperity but have now vanished with the production of tourist memorabilia being the only reminder of former times.

From Preliminary Archaeological and Historical Survey – Poltesco Valley, 2003, and according to which this factory is not Listed:-
The Poltesco serpentine factory was established in c1855 and ceased operations in c1893. It manufactured items such as church fonts, fireplaces, shop fronts and other decorative items. A late 19th-century photograph shows that the serpentine factory comprised two machine shops aligned east-west with gabled roofs, 92535 and 92536, two north-south aligned buildings with hipped roofs possibly a store 92534 the offices and showroom, 92528, and three storey warehouse with a gabled roof, 92527. To the north of the main complex was the forge, a two-storeyed building with a gabled roof, 92537.

Power for cutting, turning and polishing the stone was originally supplied by a large overshot waterwheel in the wheel pit, site 90856, which was fed by a long wooden launder, 92542, crossing high above the Poltesco stream carrying water from the ponds further up the valley, 92543 and 92544, supplied by a leat, 92545, from the dam in the river, 92546. The Trust is considering the provision of a hydroelectric turbine for the occasional supply of power to the buildings at Poltesco, which will re-use the existing ponds and watercourses. The proposal would involve piping water from the leats through the sluice gate of the lower pond to a hydro-electric turbine discreetly sited at the river bank approximately adjacent to the foundation stone of the former aqueduct, giving c6.500m head of water (Liddicoat 2000).

Steam power was introduced in 1866 and there are the remains of a boiler house, 92532, and a demolished chimney stack, 92531, and engine room, 92530, at the centre of the factory range. Whether steam power supplemented or replaced water power is not known. It was probably used for the heavier operations, sawing and surfacing while the water wheel powered the lathes. In front of the factory range is a stone saw block, where the stone was cut using a toothless saw, site 92533.

An aquatint from ‘The Illustrated London News’ (Fig 27), shows an impressive wooden gantry, site 92540, with a rail-mounted truck used for transporting stone from a platform, site 92541, on the far side of the stream with a chute, probably into the yard, site 92529, behind the office/showroom, site 92528. A travelling crane mounted on the quay, site 92538, may also have been used for this purpose.

The serpentine factory is last mentioned in Kelly’s Directory of 1893 when the manager was John Nankerris of Ruan Minor. The factory is marked as ‘Carleon Factory (Serpentine)’ on the 1879 OS map and ‘Carleon Factory (Disused)’ on the 1907 OS map (Fig 19).

The serpentine factory was mostly demolished by Mr Ironside in the 1930s after a survey for the Council for Protection of Rural England (CPRE) recommended that they were ideal for conversion to holiday homes (Unwin 1974; M Hardy pers comm).

Many stories are told of the activities of wreckers around our coasts, most of which are grossly exaggerated, but small communities occasionally and sometimes officially benefited from the spoils of shipwrecks, and petitions for lighthouses were, in certain cases, rejected on the strength of local opinion; this was particularly true in the South West of England.

The distinctive twin towers of the Lizard Lighthouse mark the most southerly point of mainland Britain, the lighthouse is a landfall and coastal mark giving a guide to vessels in passage along the English Channel and warning of the hazardous waters off Lizard Point. The coastline is particularly hazardous, and from early times the need for a beacon was obvious. Sir John Killigrew, a philanthropic Cornishman, applied for a patent. Because it was thought that light on Lizard Point would guide enemy vessels and pirates to a safe landing, the patent was granted with the proviso that the light should be extinguished at the approach of the enemy. Killigrew agreed to erect the lighthouse at his own expense, for a rent of “twenty nobles by the year”, for a term of thirty years. Although he was willing to build the tower, he was too poor to bear the cost of maintenance and intended to fund the project by collecting from ships that passed the point any voluntary contributions that the owners might offer him. Despite the difficulty of recruiting local labour, the tower was finished by Christmas 1619 and proved a great benefit to mariners. However, the shipowners offered nothing for its upkeep, and the mounting costs of maintenance were bankrupting Killigrew. Thus, in the face of more opposition from Trinity House, James I set a fee of one halfpenny a ton on all vessels passing the light. This caused such an uproar from the shipowners that the patent was withdrawn, the light extinguished and the tower demolished.

Applications were made in the ensuing years, but it was not until 1748 that Trinity House supported an attempt by Thomas Fonnereau to erect a lighthouse. The building was completed in 1752 and first lit on 22 August, consisting of two towers with a cottage built between them, in which an overlooker lay on a sort of couch, with a window on either side commanding a view of the lanterns. When the bellows-blowers relaxed their efforts and the fires dimmed, he would remind them of their duties with a blast from a cow horn.

Trinity House assumed responsibility for the lights in 1771 and commenced their wholesale improvement by replacing the coal lights with two oil lights in 1811. In 1845, three new cottages were added. But the most notable change to the site was the construction of the engine room in 1874, which made it possible to have a new fog signal and electric power for the main navigational light, powered by caloric engines and dynamos. More cottages were also added for the extra staff needed to run the now expansive site.

In 1903, a rotating First Order optic with a high-powered carbon arc light source was established in the eastern tower, and the western tower’s lantern was removed; the carbon arc light was replaced with an electric filament lamp in 1936.

The Lizard Lighthouse was automated and the keepers departed in 1998.

On 13 July 2009 HRH The Princess Royal officially opened the Lizard Lighthouse Heritage Centre—made possible by a grant from the Heritage Lottery Fund—after Trinity House renovated the Engine Room to create a flagship visitor centre. Alongside the historical engine sets, graphical, audio-visual and interactive exhibits describe the history of aids to navigation and the functions of Trinity House.

The lighthouse is now monitored and controlled from Trinity House’s Planning Centre in Harwich, Essex.

Lizard Lighthouse

Flambards Theme Park in Helston, Cornwall, featured a life-size Victorian Village with over 50 authentically recreated locations, including shops, cottages, and trades, but it has been sold and will be reimagined as a dynamic and ieractive visitors or experience opening in 2026.